Joshua Powers
on 20 September 2017
This article originally appeared on Joshua Powers’ blog
Ethereum
Ethereum has appeared more and more in the news and rightfully so. Ethereum recently set another transaction record of 400,000 transactions in a single day. Then the recent drama of the Bitcoin split has caused even more attention to Ethereum as an alternative. If you are unfamiliar with other Blockchain or Ethereum check out the following articles:
I thought it would be interesting to see what it takes to mine Ethereum. Ethereum is another crypto currency, similar to bitcoin. Before starting if you are unfamiliar with either cryptocurrencies in general or ethereum consider reading the articles below. My post is not meant to be an overview of either, but rather how I got mining Ethereum going on Ubuntu.
Ethereum Software
Currently there does not appear to be any Ethereum packages in the Ubuntu archive. However, there is a PPA for Ethereum that is available for all supported releases of Ubuntu. Inside is a package called ‘etherum’, which is a metapackage to install all the relevant software. Both the PPA and package can be installed via the following:
~ sudo add-apt-repository ppa:ethereum/ethereum -y
~ sudo apt update
~ sudo apt install ethereum -y
Wallet Address
Once installed the next step is to get a wallet address. You can create this by using geth, which is a go-lang based ethereum command line interface. Geth will ask you to create a passphrase, which you must use and not forget.
~ geth account new
 WARN [08-13|16:57:51] No etherbase set and no accounts found as default
 Your new account is locked with a password. Please give a password. Do not forget this password.
 Passphrase:
 Repeat passphrase:
 Address: {6d28522f27971cf42efa6d100576b1b34fc63188}
The value printed as the address is your personal wallet address.
Mining Software
The next step is to find software to mine ethereum. There are plenty of options to choose from:
I choose to go with ethminer because I found it was well documented, had GPU support, and seemed simple, and easy to setup.
Nodes
You can choose to mine solo or with a pool. I did not want to get geth setup to act as a node, so I instead choose to mine in a pool. Therefore, before mining we need to find a node to determine where to push our store.
I found the ethermine.org site to be straightforward and decided to mine using it.
Mining
Finally, it was time to get mining! I got ethminer setup with the instructions found on ethermine.org:
$ ./ethminer --farm-recheck 200 --opencl
    --stratum us2.ethermine.org:4444
    --failover-stratum us2.ethermine.org:14444
    --userpass 6d28522f27971cf42efa6d100576b1b34fc63188
Here is a breakdown of the options:
--farm-recheckdetermines how often to check for work-g/--openclsays to use OpenCL. If I had setup CUDA on the system and then I could have used the-U/--cudaoption.-S/--stratumand-FS/--failover-stratumare the remote nodes I am connect to.-O/--userpassis the address I generated earlier
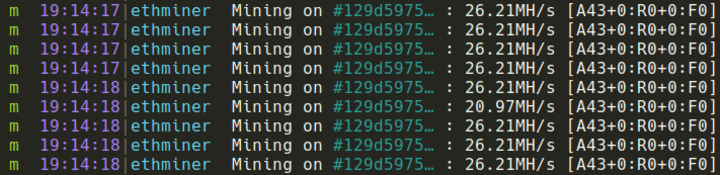
The following output comes from the ethminer showing my hashrate:
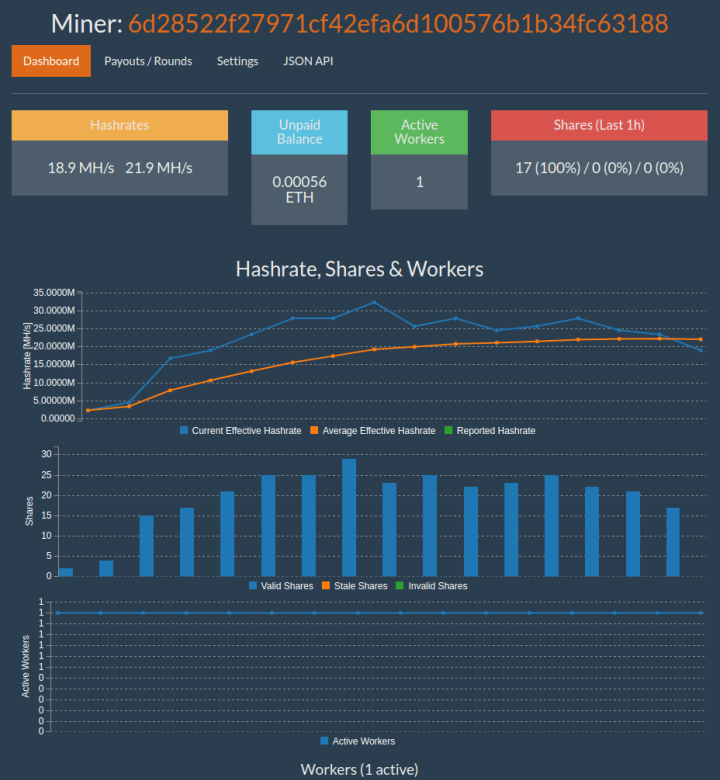
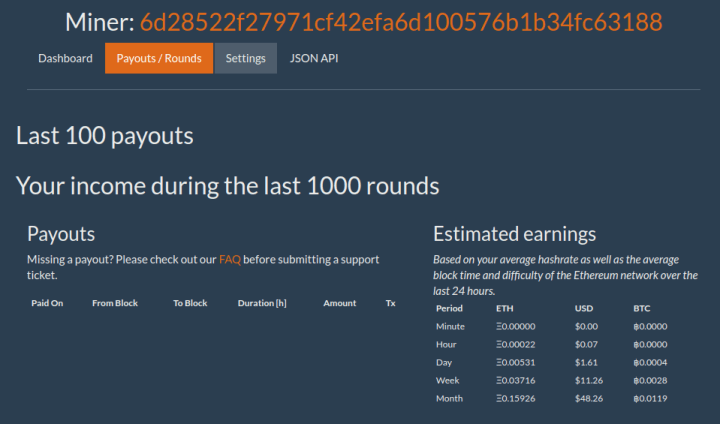
After a short time, my miner page on ethermine.org showed up and started getting filled in with statistics:
And finally, I could see the possible income from the mining:
Next Steps
The most obvious thing to try next is getting CUDA setup on this system and run using the --cuda option.
There are plenty of guides on forums and sites stating how to increase your rates to the absolute maximum either through overclocking or changing settings of the miner it self.
Playing with the other miners would also be interesting to see if there was a performance difference with any of them or easier setup and config.
Want professional Ubuntu support?
For organizations, Ubuntu Advantage is the assurance of enterprise-grade support and management tools.